Getting Started with VizDiff (GitLab) 🚀
Using GitHub instead? See the GitHub setup guide.
Prerequisite A GitLab project that already builds a Storybook (e.g. a
build-storybookjob) and Maintainer access to add CI/CD variables. Your VizDiff administrator must have configured the GitLab host and a service token for this deployment.
1. Sign in to VizDiff
Press the "Sign in" button. You will be redirected to your organization's identity provider (Microsoft Entra / SSO) to authenticate, then returned to your VizDiff projects dashboard.
2. Create a Project
Press the "Add project" button on the projects dashboard. VizDiff lists the GitLab groups and projects visible to the configured service token—select a group, then pick your project.
You do not need to authorize VizDiff against your personal GitLab account: the deployment's service token reads project metadata and posts commit statuses on your merge requests on your behalf.
After the project is created you land on its page—copy the Project Token shown there.
3. Add VIZDIFF_PROJECT_TOKEN as a GitLab CI/CD variable
In GitLab, open your project's Settings → CI/CD → Variables → Add variable:
- Key:
VIZDIFF_PROJECT_TOKEN - Value: the token you copied
- Flags: Masked (recommended). Only mark it Protected if you run VizDiff exclusively on protected branches.
Point the CLI at your self-hosted VizDiff by also setting VIZDIFF_API_URL (as another CI/CD variable, or inline in the CI file), e.g. https://vizdiff.example.com/api.
4. Add the upload step to .gitlab-ci.yml
Your pipeline must build Storybook to a directory (commonly npm run build-storybook, which outputs storybook-static), then upload it with the VizDiff CLI:
vizdiff:
  image: node:22
  variables:
    VIZDIFF_API_URL: "https://vizdiff.example.com/api"
  script:
    - npm ci
    - npm run build-storybook            # outputs ./storybook-static
    - npx @vizdiff/cli upload ./storybook-static
  rules:
    - if: $CI_PIPELINE_SOURCE == "merge_request_event"
    - if: $CI_COMMIT_BRANCH == $CI_DEFAULT_BRANCH
The CLI auto-detects GitLab's predefined variables (CI_COMMIT_SHA, CI_COMMIT_REF_NAME, CI_MERGE_REQUEST_IID, and the merge-request base branch/commit), so no extra flags are needed. VIZDIFF_PROJECT_TOKEN is read from the job environment.
5. Trigger the pipeline & watch the commit status
Open a merge request (or push to your default branch). When the upload step finishes, VizDiff posts a commit status named vizdiff/visual-tests on the pipeline commit. It stays in the "running" state while screenshots render, and if there are new or changed screenshots it remains pending until the build is approved or denied. (With no changes, it transitions to "success" automatically.)
Open the status's target link to jump to the VizDiff review page.
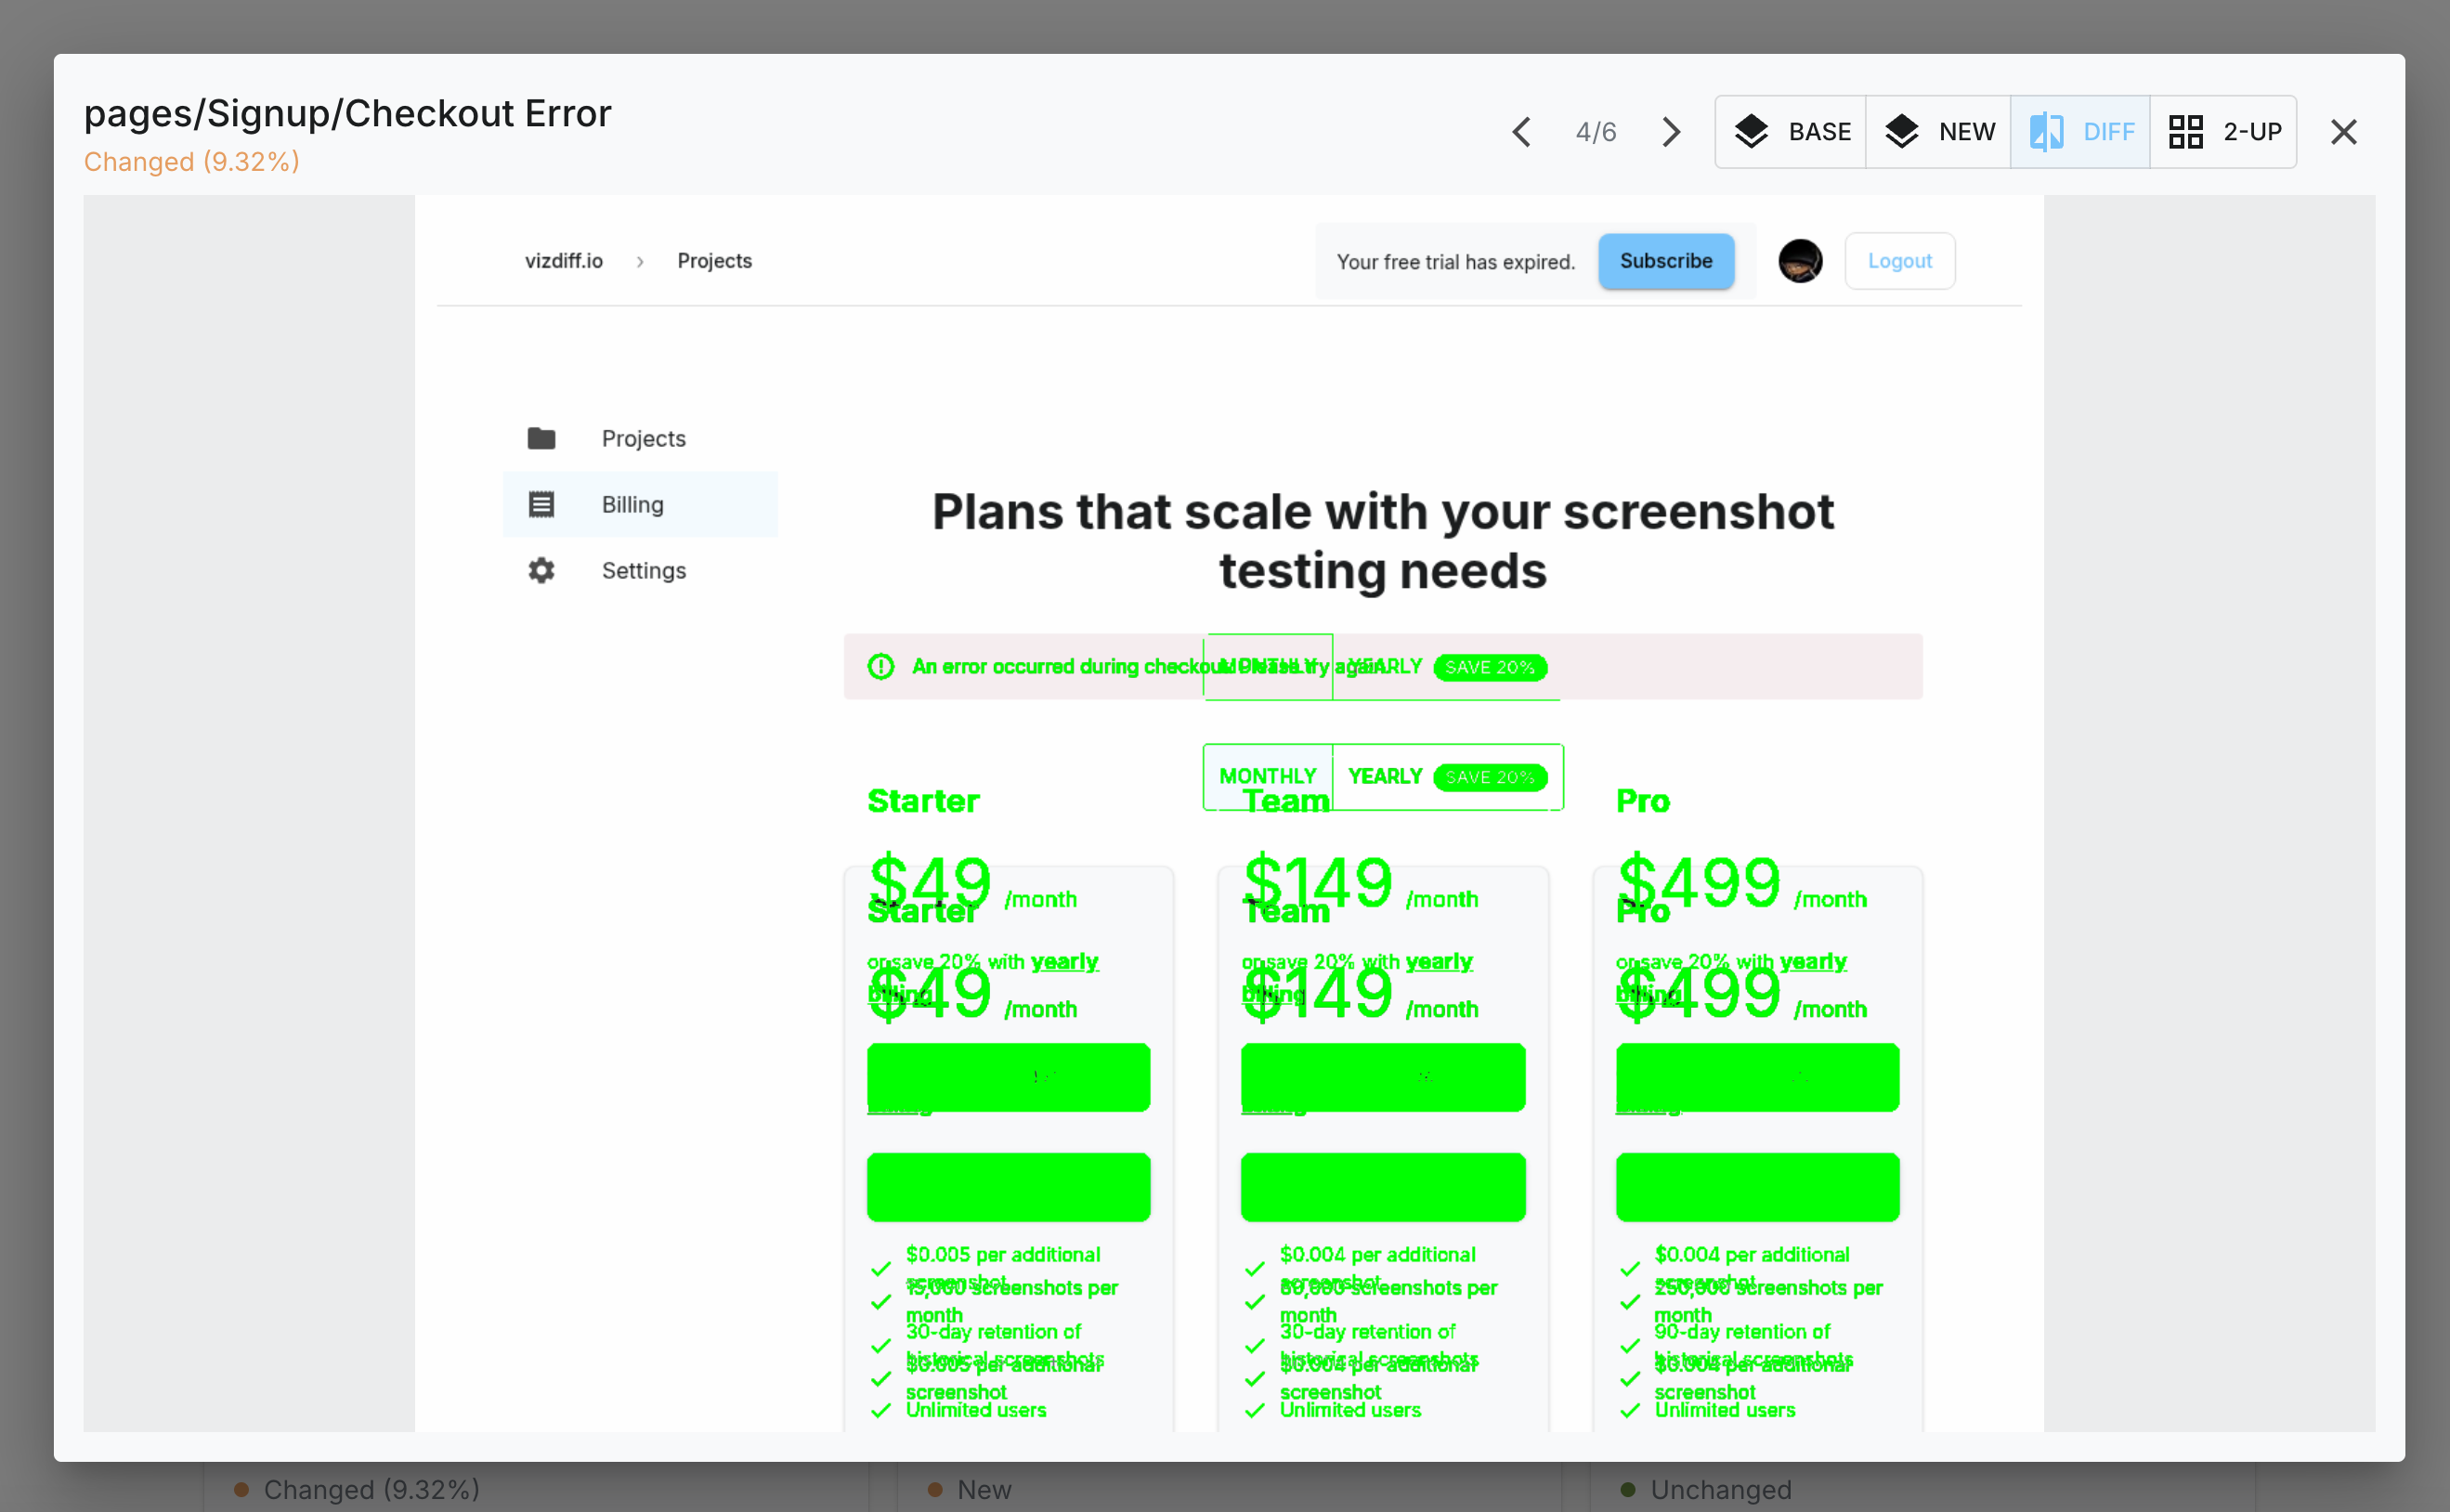
6. Review screenshots on VizDiff
The review page lists every screenshot generated for the build, sorted New → Changed → Unchanged. Click a screenshot to open the comparison dialog.

Use the arrow keys or the on-screen buttons to move between screenshots, and switch between the "Old", "New", "Diff", and "2-Up" views. In the "Diff" view, changes are highlighted.
7. Approve or Deny the build
Once you've reviewed every screenshot, approve or deny the build. Either action immediately updates the GitLab commit status to "success" or "failed".
8. Generate your first diff
The first run of any branch establishes a baseline—every screenshot shows "New". To see real diffs, push another commit to the same merge request, or branch from a commit that already has approved screenshots. Only stories that change between the two Storybook builds appear as Changed.
9. Troubleshooting
- 403 Forbidden during upload —
VIZDIFF_PROJECT_TOKENis missing or incorrect. Confirm the CI/CD variable exists and matches the project's token. - Cannot find
storybook-static— make sure your pipeline builds Storybook to that directory, or pass the correct path tovizdiff upload. - Commit status never appears — confirm
VIZDIFF_API_URLpoints at your VizDiff ingress, and that the administrator configured a GitLab service token (withapiscope and Developer or higher role) for your GitLab host. - Self-signed GitLab certificate — the administrator can disable TLS verification for your host via the
GITLAB_HOSTSconfiguration.